So, you have made the commitment to a paint by numbers kit, but how are you going to frame it, and should you do it before or after you complete it?
In this article, I will show you how to frame your painting using stretcher bars and also discuss when to do it.
Before getting started, make sure your stretchers are the same size as your canvas. If you're looking for wooden stretchers that fit 12x16", 16x16", 15x20", or 16x02" canvases, you can order a set of wooden stretchers here.
When to use stretcher bars
There is a lot of discussion on the internet about using stretcher bars before or after you complete your painting. Clearly, it can be advantageous to paint on a canvas that is already stretched. If you decide to go for that option, which means to stretch your canvas before painting it, it is perfectly fine.
Another option is to complete your painting without framing it first and then decide how you want to frame it.
In that case, you'd be best to lay your canvas on a solid structure and tape the side of your painting, that way your canvas won't move. Once you've finished your painting, you will be considering where you are going to hang it, and that may affect your decision.
If you decide to use stretcher bars at this point, it will work perfectly well. You can find out how by reading this article.
Note
I have not used canvas stretcher pliers in this article as not everybody has them but they can be useful in getting your canvas very tight. You can also use canvas wedges to push the corners of your stretcher bars out slightly to increase the tension in your canvas. You simply tap them in. In this case, I have simply used the stretcher bars and nothing else and the result is fantastic. You do not need to be an expert or have lots of specialist equipment.
The Stretching Process
You will need:
- Your painting,
- A set of stretcher bars,
- Some thumbtacks, pins, or staples (with a staple gun in this scenario),
- A tape measure or T square.
Step 1
Get your stretcher bars and lay them out. Check if they have a small ridge running around the edge on both sides of the frame or just one. If it is only on one side, it is vital that you build your frame with this ridge on the same side on all the pieces.
In this picture, you can see the ridge along the outside on both pieces as they are assembled. This ridge holds the canvas away from the frame, preventing it from showing through your painting.

Step 2
Assemble your pieces of the stretcher bar very carefully. They should fit together very tightly, so they may be difficult to assemble. If you have any difficulties, gently sand a little wood away.
Be careful not to take too much off, as they must fit tightly together.

Step 3
Place your canvas face down on a suitable flat surface. I covered my dining table with a tablecloth to protect the canvas.
Place your frame face down onto the canvas. CHECK that the side with the ridge is face down against the canvas. Position it exactly on the painting so that the painting will be in the correct position on the frame.
Check that your frame is ‘square’. By that, I mean check that all your corners are 90°. I used a T square, but you can also measure from one corner to the opposite diagonal one and repeat for the other two corners.
Both measurements should be the same. Adjust your frame until it is ‘square’.

Step 4
After double-checking that you are happy with everything, it is time to pin or staple your canvas in place. Fold the canvas around the frame on one side and start pinning the thumbtacks or staple it in place. This thumbtack, pin, or staple should be in the center of the side you are pinning/stapling.


Now repeat this process exactly opposite the first pin/staple making sure that you pull the canvas taut as you do it. This is how you will stretch the canvas into place. Repeat for the other two sides so that you have a total of four thumbtacks/staples in place.
Now check that the frame is still square and check that the painting is in the correct place. If there are any problems you can remove a pin/staple or indeed all four and correct it quite easily.

Once you are happy, continue pulling the canvas taut and pinning/stapling it in place, working steadily around all four sides in turn so that you work from the center of each side towards the corners. Stop approximately 2” from each corner. Check again that you are happy with your painting.

Step 6
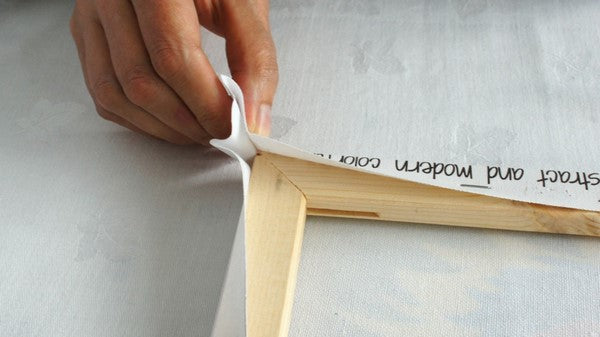
This is the most challenging bit! Pinch a section of the corner of the canvas and pull it tight.

Place it over the frame at an angle of 45°.

Now, fold the remainder of the corner over the frame so that the folded edge lines up with the corner of the frame.

Staple/pin it in place and staple/pin the rest of the canvas near that corner, remembering to pull it tight.

Repeat the process for all four corners.

Well done! You have framed your picture using stretcher bars. Now hang it in pride of place in your home and enjoy it!

This article was written by Christine of https://christines-crafts.com. It is a website dedicated to all things crafty or in the garden. It is packed with ideas and tutorials to help you achieve great things. It also includes a full review of a Winnie’s Picks painting by numbers kit, so head over to this page and have a look.


1 comment
I need 3 frames, I bought 3 paint by numbers from you, and ask for frames but didn’t receive any. Can’t seem to add to order.